How to maintain insulated siding, a question that resonates with homeowners seeking to preserve their investment and maximize its benefits. Insulated siding, a popular choice for its energy efficiency and aesthetic appeal, requires a dedicated approach to ensure it remains in pristine condition. From routine cleaning to addressing potential damage, this guide provides a comprehensive overview of maintaining your insulated siding, keeping it looking its best for years to come.
Understanding the nuances of different siding materials, proper installation techniques, and preventative measures is key to maximizing the lifespan of your insulated siding. Whether you’re a seasoned homeowner or a first-time buyer, this guide will equip you with the knowledge and tools to confidently maintain your siding, ensuring it continues to enhance your home’s curb appeal and energy efficiency.
Understanding Insulated Siding
Insulated siding is a popular choice for homeowners looking to improve their home’s energy efficiency and curb appeal. It combines the aesthetic benefits of traditional siding with the added insulation layer, creating a more comfortable and energy-saving living environment.
Benefits of Insulated Siding
Insulated siding offers a range of advantages that can significantly enhance your home’s performance and value.
- Improved Energy Efficiency: The insulation layer in insulated siding acts as a barrier against heat transfer, reducing heat loss in the winter and heat gain in the summer. This can lead to lower energy bills and a more comfortable indoor temperature year-round.
- Reduced Noise Pollution: Insulated siding provides a sound barrier, effectively reducing outside noise levels and creating a quieter interior environment.
- Enhanced Durability and Protection: The insulation layer provides added protection against the elements, such as wind, rain, and hail, extending the lifespan of your siding and minimizing maintenance requirements.
- Increased Home Value: Insulated siding is a valuable investment that can increase your home’s resale value. Potential buyers often appreciate the energy efficiency and durability benefits it offers.
Types of Insulated Siding Materials
Insulated siding is available in a variety of materials, each with its unique characteristics and advantages.
- Foam-Backed Siding: This type of siding features a layer of foam insulation attached to the back of traditional siding materials, such as vinyl, fiber cement, or wood. The foam insulation provides excellent thermal resistance and sound absorption.
- Insulated Vinyl Siding: This type of siding integrates a layer of insulation within the vinyl panels, offering a cost-effective solution with good thermal performance.
- Insulated Fiber Cement Siding: Fiber cement siding with integrated insulation provides superior durability and fire resistance, making it a suitable option for areas prone to extreme weather conditions.
Comparison of Insulated Siding Types
| Type | Pros | Cons |
|---|---|---|
| Foam-Backed Siding | Excellent insulation, good sound absorption, available in various materials | Can be more expensive than other types, requires professional installation |
| Insulated Vinyl Siding | Cost-effective, easy to install, low maintenance | Lower insulation value compared to foam-backed siding, may not be as durable |
| Insulated Fiber Cement Siding | High durability, fire resistance, excellent insulation | More expensive than other types, heavier than vinyl siding, requires professional installation |
Common Insulated Siding Brands and Features
Several reputable brands offer insulated siding options, each with its unique features and specifications.
- CertainTeed: CertainTeed offers a wide range of insulated siding products, including foam-backed vinyl and fiber cement siding. Their products are known for their durability, energy efficiency, and aesthetic appeal.
- James Hardie: James Hardie specializes in fiber cement siding, including insulated options. Their products are highly durable, fire-resistant, and offer excellent insulation performance.
- LP Building Products: LP Building Products offers a variety of insulated siding options, including SmartSide engineered wood siding with integrated insulation. Their products are known for their durability, moisture resistance, and energy efficiency.
Installation and Maintenance Basics
Installing insulated siding is a relatively straightforward process that can significantly improve your home’s energy efficiency and curb appeal. Proper installation is crucial for maximizing the benefits of insulated siding, ensuring its longevity, and preventing potential problems.
Installation Process
Installing insulated siding involves a series of steps that require careful attention to detail. Here’s a step-by-step guide to the process:
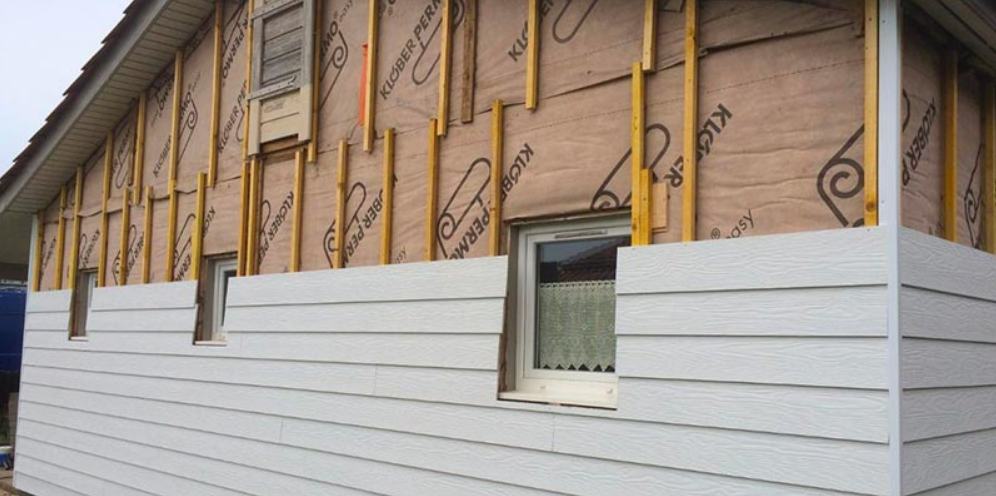
- Preparation: The first step is to prepare the existing siding surface. This involves removing any old siding, trim, or other obstructions. Inspect the underlying sheathing for any damage or rot and repair it as needed.
- Framing: Install furring strips to create a space for the insulation and siding. These strips are typically made of wood or metal and are attached to the existing sheathing. The spacing of the furring strips should be determined by the width of the siding panels.
- Insulation: Insulation panels are then placed between the furring strips. The type of insulation used will depend on the climate and the desired level of energy efficiency.
- Siding Installation: Once the insulation is in place, the siding panels are installed over the furring strips. The panels are typically attached with nails or screws. Start at the bottom of the wall and work your way up, ensuring that each panel is properly aligned and secured.
- Trim and Accessories: After the siding panels are installed, install trim around windows, doors, and other openings. Also, install any necessary accessories, such as corner pieces, J-channels, and flashing.
Tools and Equipment
Installing insulated siding requires a range of tools and equipment to ensure a successful and efficient installation. Here’s a list of essential tools:
- Measuring Tape: Accurate measurements are essential for proper siding installation.
- Level: A level ensures that the siding panels are installed straight and plumb.
- Circular Saw: A circular saw is used to cut the siding panels to size.
- Hammer or Drill: A hammer or drill is used to secure the siding panels to the furring strips.
- Safety Glasses: Protect your eyes from flying debris during cutting and installation.
- Work Gloves: Protect your hands from cuts and splinters.
Best Practices for Installation
Following best practices during installation is crucial for ensuring the longevity and performance of your insulated siding. Here are some key considerations:
- Proper Ventilation: Ensure adequate ventilation behind the siding to prevent moisture buildup, which can lead to mold and rot.
- Weatherproofing: Use weatherproof tape and sealant around windows, doors, and other openings to prevent water infiltration.
- Moisture Barrier: Install a moisture barrier behind the siding to prevent water damage.
- Proper Fasteners: Use the correct fasteners for the type of siding and the underlying sheathing.
- Professional Installation: While DIY installation is possible, it’s recommended to consult with a professional installer for complex projects or if you are unsure about any aspect of the installation process.
Routine Maintenance
Insulated siding requires minimal maintenance to maintain its appearance and performance. Here are some routine maintenance tasks:
- Regular Cleaning: Clean the siding periodically with a mild detergent and water to remove dirt, grime, and debris. Avoid using harsh chemicals or abrasive cleaners.
- Inspect for Damage: Inspect the siding for any damage, such as cracks, dents, or loose panels. Repair or replace any damaged sections promptly.
- Check Fasteners: Check the fasteners holding the siding panels to ensure they are secure. Tighten any loose fasteners.
- Maintain Trim and Accessories: Keep the trim and accessories around windows, doors, and other openings in good condition. Repair or replace any damaged or worn components.
Cleaning and Repair
Maintaining the pristine look and functionality of your insulated siding requires regular cleaning and timely repairs. This section will guide you through the best practices for keeping your siding clean and addressing any damage that may arise.
Cleaning Insulated Siding
Cleaning your insulated siding regularly helps maintain its appearance and protects it from damage.
Here are some cleaning tips:
- Use a mild detergent: A gentle soap solution is usually sufficient for cleaning most dirt and grime. Avoid harsh chemicals or abrasive cleaners, as they can damage the siding’s finish.
- Apply with a soft-bristled brush: Use a soft-bristled brush to apply the cleaning solution. Avoid using stiff brushes or high-pressure washers, as they can scratch or damage the siding.
- Rinse thoroughly: After cleaning, rinse the siding thoroughly with clean water to remove any soap residue.
- Inspect for damage: During cleaning, carefully inspect the siding for any signs of damage, such as cracks, dents, or loose panels.
Repairing Damaged Insulated Siding
While insulated siding is durable, it can still be susceptible to damage.
- Minor scratches and dents: Minor scratches and dents can often be repaired using a touch-up paint. Choose a paint that matches the siding’s color and apply it with a small brush.
- Cracked or broken panels: Cracked or broken panels require replacement. Contact a professional siding contractor for a proper assessment and repair.
- Loose panels: Loose panels can be caused by improper installation or weather damage. If the panel is only slightly loose, you can try to tighten the screws or nails. If the panel is significantly loose, you’ll need to contact a professional siding contractor for assistance.
Preventing Moisture Damage
Insulated siding is designed to provide excellent thermal insulation, but it’s crucial to prevent moisture buildup behind the siding to maintain its effectiveness and protect your home from potential damage. Moisture can lead to mold growth, wood rot, and structural issues, so understanding how to prevent it is essential.
Proper Ventilation
Adequate ventilation is key to preventing moisture buildup behind insulated siding. This involves creating a continuous path for air to circulate, allowing moisture to escape and preventing it from accumulating.
- Soffit vents: These vents are installed under the eaves of your roof and allow air to enter the attic space. They are essential for drawing out warm, moist air from the attic, reducing the risk of condensation on the underside of the roof sheathing.
- Gable vents: Located in the gable ends of your roof, these vents provide additional ventilation and help to create a balanced airflow through the attic. They work in conjunction with soffit vents to ensure proper air circulation.
- Ridge vents: These vents run along the ridge of your roof and allow warm, moist air to escape. They provide continuous ventilation and help to prevent moisture from becoming trapped in the attic space.
Potential Moisture Penetration Points
Several areas of your home can be vulnerable to moisture penetration, particularly around insulated siding. Understanding these areas can help you take preventative measures:
- Window and door flashing: Improperly installed or damaged flashing around windows and doors can allow water to seep behind the siding and into the wall cavity. Inspect flashing regularly for any signs of damage or gaps.
- Siding seams: The seams between siding panels are potential entry points for moisture. Ensure that the seams are properly sealed with a high-quality sealant and that any gaps or cracks are repaired promptly.
- Roof overhangs: If the overhangs of your roof are too short, they may not adequately protect the siding from rain. Ensure that the overhangs extend at least 18 inches beyond the exterior walls.
Moisture Management Strategies
Several strategies can help manage moisture and prevent damage behind your insulated siding:
- Regular inspections: Regularly inspect your siding for any signs of damage, such as cracks, gaps, or loose panels. Address any issues promptly to prevent moisture from entering the wall cavity.
- Proper drainage: Ensure that your gutters are clean and functioning properly to prevent water from pooling near the foundation and potentially seeping into the wall cavity.
- Landscaping considerations: Plant trees and shrubs away from your home to avoid blocking airflow and preventing water from draining away from the foundation. Consider the direction of prevailing winds and ensure that vegetation doesn’t impede airflow around the house.
- Professional maintenance: Regularly have a professional inspect and maintain your siding to ensure that it’s in good condition and that any potential moisture issues are addressed promptly.
Energy Efficiency and Cost Savings
Insulated siding offers significant energy efficiency benefits, directly impacting your wallet by reducing heating and cooling costs. This section explores the advantages of insulated siding in detail, providing practical examples and tips for maximizing its energy-saving potential.
Reduced Heating and Cooling Costs
Insulated siding acts as a barrier against heat transfer, preventing the loss of warm air during winter and the intrusion of hot air during summer. This significantly reduces the strain on your HVAC system, leading to lower energy consumption and reduced heating and cooling costs.
Insulated siding can reduce your heating and cooling costs by up to 20%, depending on your climate and existing insulation levels.
Case Studies and Cost Savings Examples
Numerous case studies and real-world examples demonstrate the financial benefits of insulated siding. For instance, a homeowner in a cold climate with a 2,000 square foot home saw an average annual heating cost reduction of $400 after installing insulated siding. This translates to a significant long-term savings, recouping the initial investment over time.
Tips for Maximizing Energy Efficiency with Insulated Siding
- Choose high-quality insulated siding with a high R-value. The R-value measures the resistance to heat flow, and higher R-values indicate better insulation.
- Ensure proper installation to avoid gaps or air leaks. A professional installation ensures optimal insulation performance and maximizes energy savings.
- Consider combining insulated siding with other energy-efficient upgrades, such as attic insulation or window replacement, for a comprehensive approach to reducing energy consumption.
Final Review
Maintaining insulated siding is an investment in your home’s longevity and value. By following the tips and strategies outlined in this guide, you can ensure your siding remains in top condition, providing years of reliable performance and aesthetic appeal. From regular cleaning to addressing potential damage, taking proactive steps will help you protect your investment and enjoy the numerous benefits of insulated siding for years to come. Remember, a little effort now can go a long way in preserving the beauty and functionality of your home’s exterior.